
How to Make Restaurant Style Fried Chicken at Home
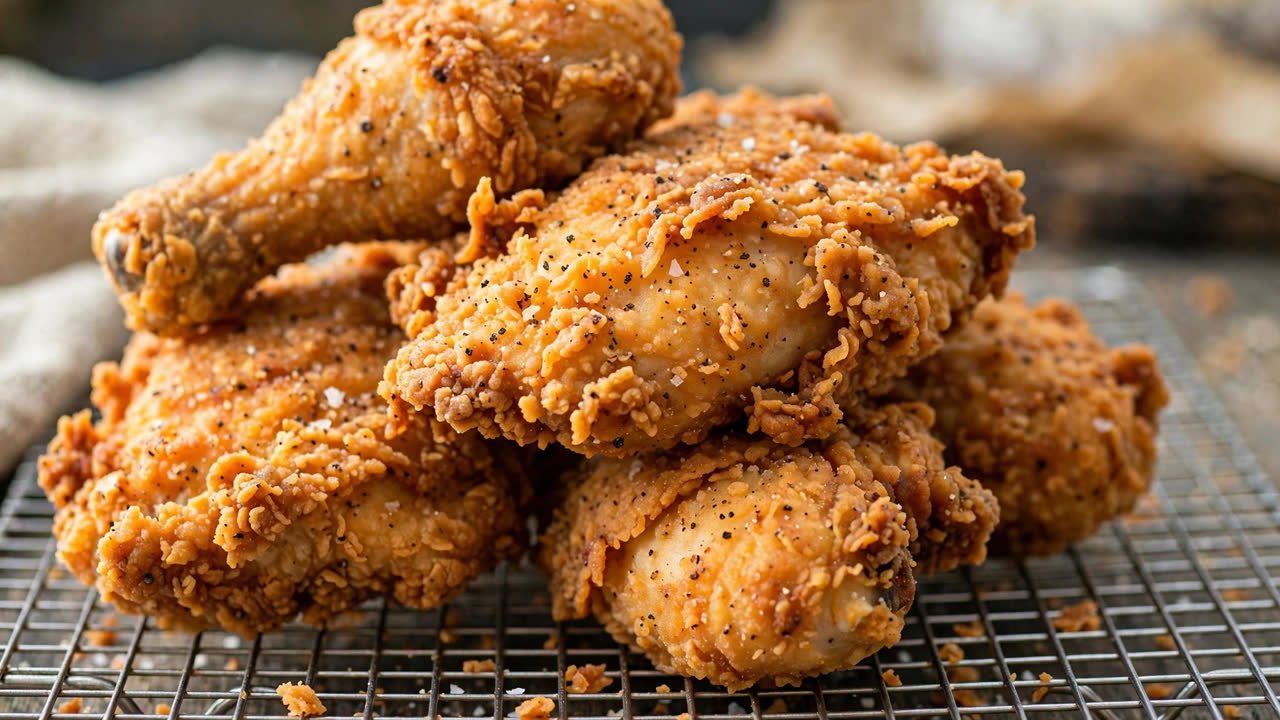
This fried chicken recipe brings the crispy, golden goodness of your favorite Southern diner right to your kitchen. I still remember the first time I nailed that shattering crust with juicy meat inside. It felt like a small celebration.
This guide walks you through every step, from brining and seasoning to frying and resting, so you can serve up golden-brown perfection that rivals any chain or roadside joint. Whether you’re cooking for a family dinner or hosting a backyard feast, this method delivers consistent, mouthwatering results every time.
Restaurant Style Fried Chicken
Ingredients
Equipment
Method
- Brine the chicken in buttermilk and salt for 4 to 12 hours in the refrigerator. Remove and let excess drip off.
- Set up three dredging stations: seasoned flour, egg-buttermilk mixture, and more seasoned flour.
- Double-dredge each piece: coat in flour, dip in wet mixture, then coat in flour again. Press to seal. Rest 10 to 15 minutes.
- Heat 2 to 3 inches of oil in a Dutch oven to 350 degrees F over medium-high heat.
- Fry 3 to 4 pieces at a time for 12 to 15 minutes, turning once, until golden and internal temp reaches 165 degrees F.
- Drain on a wire rack over a baking sheet. Rest 5 to 10 minutes before serving.
Notes
Why Restaurant Fried Chicken Tastes So Good
Restaurant-style fried chicken stands out because of its balance of texture, flavor, and moisture. The secret isn’t just in the frying—it’s in the preparation. Most top-tier fried chicken starts with a brine or marinade that infuses the meat with salt, acid, and seasonings, ensuring it stays juicy even after high-heat cooking.
The coating is another key factor. Unlike home recipes that rely solely on flour, professional kitchens often use a combination of flour, cornstarch, and sometimes rice flour to create an ultra-crisp crust that stays crunchy longer. Double-dredging—dipping the chicken in seasoned flour, then wet batter, then flour again—adds layers of texture that make each bite satisfying.
Finally, temperature control during frying is critical. Restaurants use thermometers and consistent oil temperatures (usually between 325°F and 350°F) to ensure even cooking without burning the exterior or leaving the inside undercooked. At home, mimicking this precision is what separates good fried chicken from great.
Essential Ingredients for Authentic Fried Chicken
You don’t need exotic ingredients to make restaurant-quality fried chicken. Most of what you need is likely already in your pantry or fridge. The magic lies in how you use them.
The Chicken
Start with fresh, high-quality chicken pieces. Bone-in, skin-on thighs and drumsticks are ideal because they stay moist during frying. Breasts can work too, but they’re more prone to drying out. Avoid pre-cut or frozen chicken if possible—fresh gives you better control over texture and flavor.
The Brine (Optional but Recommended)
A buttermilk brine is a game-changer. It tenderizes the meat, adds subtle tang, and helps the coating stick. For every 4 cups of buttermilk, add 2 tablespoons of salt and let the chicken soak for at least 4 hours—or overnight for maximum flavor penetration.
The Seasoned Flour Mixture
This is where the flavor begins. Use all-purpose flour as the base, then boost it with cornstarch (for extra crispness) and a blend of spices. A classic mix includes:
- 2 cups all-purpose flour
- ¼ cup cornstarch
- 1 tablespoon paprika
- 1 tablespoon garlic powder
- 1 tablespoon onion powder
- 1 teaspoon cayenne pepper (adjust to taste)
- 1 teaspoon black pepper
- 2 teaspoons salt
- 1 teaspoon dried thyme or oregano (optional)
Mix everything thoroughly so the seasoning is evenly distributed. This dry blend will be used for both the initial dredge and the final coating.
The Wet Dredge
After the dry flour, dip the chicken into a wet mixture to create a sticky surface that grabs the second layer of flour. A simple egg wash works, but for extra richness and binding power, use:
- 2 large eggs
- ½ cup buttermilk
- 1 teaspoon hot sauce (optional, for depth)
Whisk until smooth. This step ensures the coating adheres tightly and puffs up beautifully during frying.
The Oil
Choose an oil with a high smoke point and neutral flavor. Vegetable oil, canola oil, or peanut oil are excellent choices. Avoid olive oil—it burns too easily at frying temperatures. You’ll need enough oil to submerge the chicken halfway (about 2–3 inches deep in a heavy pot).
Step-by-Step Method for Perfect Fried Chicken
Now that your ingredients are ready, it’s time to cook. Follow these steps carefully for crispy, golden, restaurant-style results.
Step 1: Brine the Chicken (4 to 12 Hours Ahead)
Place chicken pieces in a large bowl and cover with buttermilk brine (buttermilk + salt). Cover and refrigerate for at least 4 hours, preferably overnight. This step is optional but highly recommended—it dramatically improves juiciness and flavor.
Step 2: Prepare the Dredging Stations
Set up three shallow bowls or trays:
- Bowl 1: Seasoned flour mixture
- Bowl 2: Wet egg-buttermilk mixture
- Bowl 3: More seasoned flour (for the second dredge)
Take the chicken out of the brine and let excess liquid drip off. Don’t rinse—the buttermilk helps the coating stick.
Step 3: Double-Dredge Each Piece
Dredging in layers creates that signature crunchy crust. Here’s how:
- Coat chicken thoroughly in the first bowl of seasoned flour. Press the flour into the skin to ensure full coverage.
- Dip into the wet mixture, letting excess drip off.
- Return to the flour bowl for a second coating. Press again to seal. This double layer is key to restaurant-style texture.
- Place dredged chicken on a wire rack and let rest for 10 to 15 minutes. This “resting” step allows the coating to set, reducing the chance of it falling off during frying.
Step 4: Heat the Oil
Pour 2 to 3 inches of oil into a heavy-bottomed pot (like a Dutch oven). Heat over medium-high until it reaches 350°F (175°C). Use a deep-fry or candy thermometer to monitor. This is crucial. If the oil is too cool, the chicken will absorb grease and become soggy. If too hot, the coating burns before the meat cooks through.
Step 5: Fry in Batches
Carefully lower 3 to 4 pieces into the hot oil. Don’t overcrowd, or the temperature will drop. Fry for 12 to 15 minutes total, turning once halfway through. Dark meat (thighs, drumsticks) may take slightly longer than white meat.
The chicken is done when the internal temperature reaches 165°F (74°C) and the coating is deep golden brown. Use a meat thermometer to check—don’t rely solely on color.
Step 6: Drain and Rest
Use tongs or a slotted spoon to transfer fried chicken to a wire rack set over a baking sheet. This keeps the bottom crispy—never stack or place on paper towels, which traps steam and softens the crust.
Let rest for 5 to 10 minutes before serving. This brief pause allows juices to redistribute, ensuring every bite is moist and flavorful.
Pro Tips for Restaurant-Quality Results
Even small adjustments can elevate your fried chicken from good to exceptional. Here are expert-backed tips used by professional kitchens:
- Use a wire rack: Always drain fried chicken on a rack, not paper towels. This prevents sogginess and maintains crispness.
- Maintain oil temperature: After adding chicken, the oil temp will drop. Adjust heat to bring it back to 325 to 350°F and keep it steady.
- Season the flour generously: Don’t skimp on salt and spices in the coating. This is your main flavor layer.
- Fry dark and white meat separately: Thighs and drumsticks take longer than breasts. Frying them together risks overcooking the white meat.
- Add a pinch of baking powder: Some chefs mix ½ teaspoon of baking powder into the flour for extra lift and crunch.
- Reuse oil wisely: After frying, strain the oil through a fine mesh sieve and store in a cool, dark place. It can be reused 2–3 times for frying (not sautéing).
Serving Suggestions and Pairings
Restaurant-style fried chicken shines when paired with classic Southern sides. Serve hot with:
- Fluffy buttermilk biscuits
- Creamy coleslaw
- Mac and cheese
- Collard greens
- Cornbread
- Honey butter or hot sauce on the side
For a lighter option, pair with a fresh green salad or roasted vegetables. Leftovers? Cold fried chicken is a Southern tradition—perfect for picnics or next-day sandwiches.
Nutritional Considerations
While delicious, fried chicken is calorie-dense due to the oil and coating. A single fried chicken thigh (with skin) contains approximately 250–300 calories, 15–20g of fat, and 25–30g of protein. To make it slightly healthier:
- Bake instead of fry (though texture will differ)
- Use skinless cuts
- Reduce salt in the brine and seasoning
- Serve smaller portions with more vegetables
Enjoy in moderation as part of a balanced diet—especially when made at home with quality ingredients.
Key Takeaways
- Restaurant-style fried chicken starts with a buttermilk brine for juiciness and flavor.
- Double-dredging in seasoned flour creates a thick, crispy crust.
- Maintain oil temperature between 325°F and 350°F for even cooking.
- Use a wire rack to drain—never paper towels—to preserve crunch.
- Let chicken rest after frying to lock in moisture.
- Season the flour generously—this is where most of the flavor comes from.
Frequently Asked Questions
Can I make fried chicken without a thermometer?
While possible, it’s not recommended. Without a thermometer, it’s easy to undercook the chicken or burn the coating. If you don’t have one, look for visual cues: the oil should bubble steadily around the chicken, and the coating should turn deep golden brown in 12–15 minutes. Still, investing in an inexpensive candy or deep-fry thermometer is worth it for consistent results.
Can I bake fried chicken instead of frying?
Yes, but the texture won’t be the same. For a healthier version, spray dredged chicken with oil and bake at 425°F (220°C) for 35–40 minutes, flipping halfway. It will be crispy and flavorful, but not as crunchy or rich as deep-fried. For best results, use a wire rack on a baking sheet to allow air circulation.
How do I keep fried chicken crispy for a party or gathering?
To maintain crispness, keep fried chicken warm in a 200°F (95°C) oven on a wire rack. Avoid covering it, as trapped steam softens the crust. Serve within 1–2 hours for peak texture. For large batches, fry in stages and keep finished pieces warm while you cook the rest.
Final Thoughts
Making restaurant-style fried chicken at home is not just possible. It is deeply rewarding. With the right brine, seasoning, and a little patience, you can create something truly special.
This recipe puts you in control of every ingredient, from the quality of the chicken to the blend of spices in the coating. No preservatives, no mystery oils—just honest, delicious cooking that tastes like it came straight from a Southern kitchen.
So roll up your sleeves, heat that oil, and get ready to impress your family and friends with fried chicken that’s crispy, juicy, and full of soul. Once you master this method, you’ll never look at takeout the same way again.
For more crispy comfort food, try our homemade falafel and Turkish kebabs. For expert frying tips, see this Serious Eats guide.
About the Author
Luke is the home cook and writer behind Lumomint Foods. He spends his time testing comforting, practical recipes from around the world and writing them up in plain, easy language for everyday cooks.
1 thought on “How to Make Restaurant Style Fried Chicken at Home”