
How to Make Crispy Onion Rings at Home
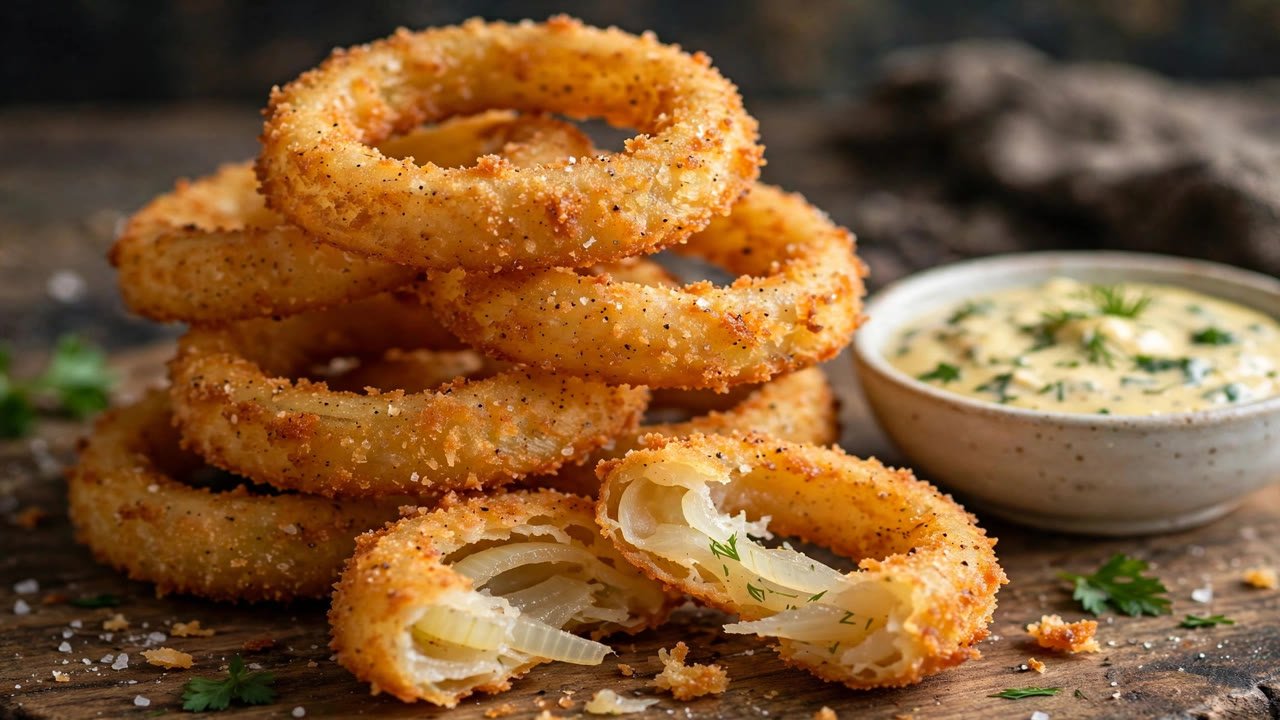
Want restaurant-quality crispy onion rings without leaving your kitchen? You’re in the right place. Making perfectly golden, crunchy onion rings at home is easier than you think, and far tastier than anything you’ll get through a drive-thru. With just a few simple ingredients and the right technique, you can create light, airy, and shatteringly crisp onion rings that stay crunchy from first bite to last. No soggy centers, no greasy mess, just pure, satisfying crunch.
I love serving these alongside burgers and sandwiches for the ultimate comfort meal. They are simple, fun to make, and dangerously easy to eat.
Crispy Homemade Onion Rings
Ingredients
Method
- Peel the onions and slice into 1/2-inch rounds. Separate into individual rings and pat dry with paper towels.
- In a large bowl, whisk together the flour, cornstarch, baking powder, salt, garlic powder, paprika, and cayenne (if using).
- Slowly whisk in the cold sparkling water or beer until the batter is smooth and thin enough to coat a spoon.
- Pour the oil into a heavy pot to a depth of 2 to 3 inches and heat to 375 degrees F (190 degrees C).
- Working in batches, dip each onion ring into the batter, let the excess drip off, and carefully lower into the hot oil.
- Fry 2 to 3 minutes, flipping once, until golden brown and crisp. Lift out with a slotted spoon and drain on a wire rack.
- Sprinkle immediately with flaky sea salt and serve hot with your favorite dipping sauce.
Notes
Why Homemade Onion Rings Taste Better
Store-bought or fast-food onion rings often rely on thick batters, preservatives, or reheating methods that sacrifice texture and flavor. When you make them at home, you control every element: fresh onions, quality oil, and a light coating that clings perfectly without weighing them down. The result? A crispy exterior that gives way to sweet, tender onion inside, every single time. For the science behind an extra-crisp crust, see Serious Eats’ foolproof onion rings.
Plus, homemade onion rings are customizable. Want extra spice? Add cayenne to your batter. Prefer a gluten-free version? Swap in almond flour or cornstarch. Once you master the basics, you can tweak the recipe to match your taste.
Essential Ingredients for Perfect Crispy Onion Rings
You don’t need fancy equipment or hard-to-find ingredients. Most of what you need is already in your pantry. Here’s what makes the difference. See the recipe card below for exact amounts.
- Onions: Sweet onions like Vidalia or Walla Walla work best. They’re mild, juicy, and caramelize beautifully when fried.
- Batter base: A mix of all-purpose flour and cornstarch creates a light, crispy crust. Cornstarch adds crunch and prevents sogginess.
- Liquid: Cold sparkling water or beer makes the batter airy and helps it adhere to the onion slices. The bubbles create micro-cavities for extra crispness.
- Seasonings: Salt, garlic powder, paprika, and black pepper add depth. For heat, add a pinch of cayenne.
- Breading (optional): For an extra-crisp layer, dip battered rings in panko breadcrumbs before frying.
- Oil: Use a neutral oil with a high smoke point, like canola, vegetable, or peanut oil, for deep frying.
Pro Tip: Keep Everything Cold
Temperature matters. Cold batter and cold onions help prevent the coating from absorbing too much oil. Chill your onions in the fridge for 15 to 20 minutes before slicing, and keep your batter in the fridge until ready to use.
Step-by-Step Guide to Making Crispy Onion Rings
1. Prep the Onions
Start with one large sweet onion. Peel it and slice into 1/2-inch thick rounds. Gently separate the rings. Discard the small inner pieces or save them for soups or stir-fries. Rinse the rings under cold water to remove excess starch, which can make the batter gummy. Pat them completely dry with paper towels. Moisture is the enemy of crispiness.
2. Make the Batter
In a mixing bowl, whisk together:
- 1 cup all-purpose flour
- 1/4 cup cornstarch
- 1 tsp baking powder (for lift)
- 1 tsp salt
- 1/2 tsp garlic powder
- 1/2 tsp paprika
- Optional: 1/4 tsp cayenne pepper
Slowly whisk in 1 cup of cold sparkling water or chilled beer until smooth. The batter should be thick but pourable, like heavy cream. If it’s too thick, add a tablespoon more liquid. If too thin, add a bit more flour. Cover and refrigerate while you heat the oil.
3. Heat the Oil
Pour 2 to 3 inches of oil into a heavy-bottomed pot or deep fryer. Heat to 375°F (190°C). Use a thermometer. This is crucial. If the oil is too cool, the rings will soak up grease. If too hot, the outside will burn before the inside cooks.
To test without a thermometer, drop a small bit of batter into the oil. If it sizzles immediately and rises to the surface, you’re ready.
4. Coat and Fry
Working in batches, dip each onion ring into the cold batter, letting excess drip off. Carefully lower into the hot oil. Don’t overcrowd the pot. Fry 4 to 5 rings at a time.
Fry for 2 to 3 minutes, flipping once, until golden brown and crisp. Use tongs or a slotted spoon to remove and place on a wire rack set over a baking sheet. Avoid paper towels. They trap steam and make rings soggy.
5. Season and Serve Immediately
While still hot, sprinkle with a pinch of flaky sea salt. Serve right away with your favorite dipping sauce. Ranch, chipotle aioli, or spicy ketchup work beautifully. They are the perfect partner for our American burger recipes through the decades.
How to Keep Onion Rings Crispy Longer
One of the biggest challenges with fried foods is maintaining crispness. Here’s how to keep your onion rings crunchy:
- Use a wire rack: Never let fried rings sit directly on a plate or paper towel. Elevating them allows air to circulate and prevents steam buildup.
- Reheat properly: If you have leftovers (unlikely!), reheat in a 400°F (200°C) oven for 5 to 7 minutes. Avoid the microwave. It turns crispy foods limp.
- Double-fry method (optional): For extra crunch, fry once at 325°F (160°C) for 2 minutes to cook through, then again at 375°F (190°C) for 1 minute to crisp up. This is a pro trick used in many restaurants.
Gluten-Free and Healthier Alternatives
Yes, you can make crispy onion rings without traditional flour, and still get that satisfying crunch.
Gluten-Free Version
Replace all-purpose flour with a 1:1 gluten-free flour blend and keep the cornstarch. Add 1/2 tsp xanthan gum if your blend doesn’t include it. This helps bind the batter. Proceed as usual. The texture will be nearly identical.
Air Fryer Onion Rings
Craving a lighter option? Air frying works surprisingly well. After dipping in batter, place rings in a single layer in the air fryer basket. Spray lightly with oil. Cook at 400°F (200°C) for 8 to 10 minutes, flipping halfway. They won’t be quite as crispy as deep-fried, but still delicious and much lower in fat.
Baked Onion Rings (For a Healthier Option)
For a baked version, use a breading station: dredge onion rings in flour, dip in beaten egg, then coat with panko breadcrumbs mixed with a little cornstarch. Place on a parchment-lined baking sheet, spray with oil, and bake at 425°F (220°C) for 15 to 20 minutes, flipping once. Crispier than you’d expect, and perfect for weeknights.
Common Mistakes to Avoid
Even experienced cooks can run into issues. Here’s what to watch out for:
- Using the wrong onion: Strong, pungent onions like yellow or red can overpower the dish. Stick with sweet varieties for balance.
- Overmixing the batter: Stir just until combined. Overmixing develops gluten, leading to a tough coating.
- Frying at the wrong temperature: Oil that’s too cool means greasy rings. Too hot means burnt outside, raw inside.
- Not drying the onions: Any moisture will cause the batter to slide off or steam instead of crisp.
- Skipping the cornstarch: It’s the secret to extra crunch. Don’t omit it!
Flavor Variations and Dipping Sauces
Once you’ve mastered the classic version, experiment with flavors:
- Spicy onion rings: Add 1/2 tsp cayenne and 1 tsp smoked paprika to the batter.
- Cheesy onion rings: Mix 2 tbsp grated Parmesan into the flour mixture.
- Herb-crusted: Stir in 1 tsp dried oregano or thyme for an aromatic twist.
- Beer-battered: Use a light lager or IPA for a malty, slightly bitter note that complements the sweetness of the onion.
Pair with bold dips to elevate the experience:
- Chipotle Ranch: Mix 1/4 cup ranch with 1 to 2 tsp adobo sauce from canned chipotle peppers.
- Honey Sriracha: Combine 2 tbsp honey, 1 tbsp sriracha, and a splash of lime juice.
- Garlic Aioli: Whisk 1/2 cup mayo with 1 minced garlic clove, 1 tsp lemon juice, and a pinch of salt.
Key Takeaways
- Use sweet onions and cold batter for the crispiest results.
- Cornstarch in the batter is essential for crunch.
- Fry at 375°F (190°C) and avoid overcrowding the pot.
- Drain on a wire rack, not paper towels, to maintain crispness.
- Gluten-free and air-fried versions work well with minor adjustments.
- Serve immediately with flavorful dips for the best experience.
Frequently Asked Questions
Can I make onion rings ahead of time?
It’s best to serve them fresh, but you can prep the onions and batter up to 2 hours in advance. Keep the batter chilled and the onion rings covered in the fridge. Fry just before serving for maximum crispness.
Why are my onion rings soggy?
Sogginess usually comes from undercooked batter, oil that’s too cool, or draining on paper towels. Ensure your oil is at 375°F, fry until golden, and use a wire rack to cool.
Can I freeze homemade onion rings?
Yes! Fry them until just set but not fully golden, then freeze on a baking sheet. Once frozen, transfer to a bag. Reheat in a 400°F oven for 10 to 12 minutes until crispy. They won’t be quite as good as fresh, but still tasty.
Final Thoughts
Making crispy onion rings at home is a game-changer. With the right technique, you can achieve that perfect balance of crunch and tenderness that fast food just can’t match. Whether you’re serving them as an appetizer, a side, or a snack, these golden rings are sure to impress. Plus, they’re a fun cooking project, great for family nights or impressing guests.
So grab some sweet onions, heat up that oil, and get frying. Once you taste your first homemade crispy onion ring, you’ll never look back. And for a sweet finish, try our simple desserts with 5 ingredients or fewer.
About the Author
Luke is the home cook and writer behind Lumomint Foods. He spends his time testing comforting, practical recipes from around the world and writing them up in plain, easy language for everyday cooks.
4 thoughts on “How to Make Crispy Onion Rings at Home”