
Easy Homemade Donuts Recipe
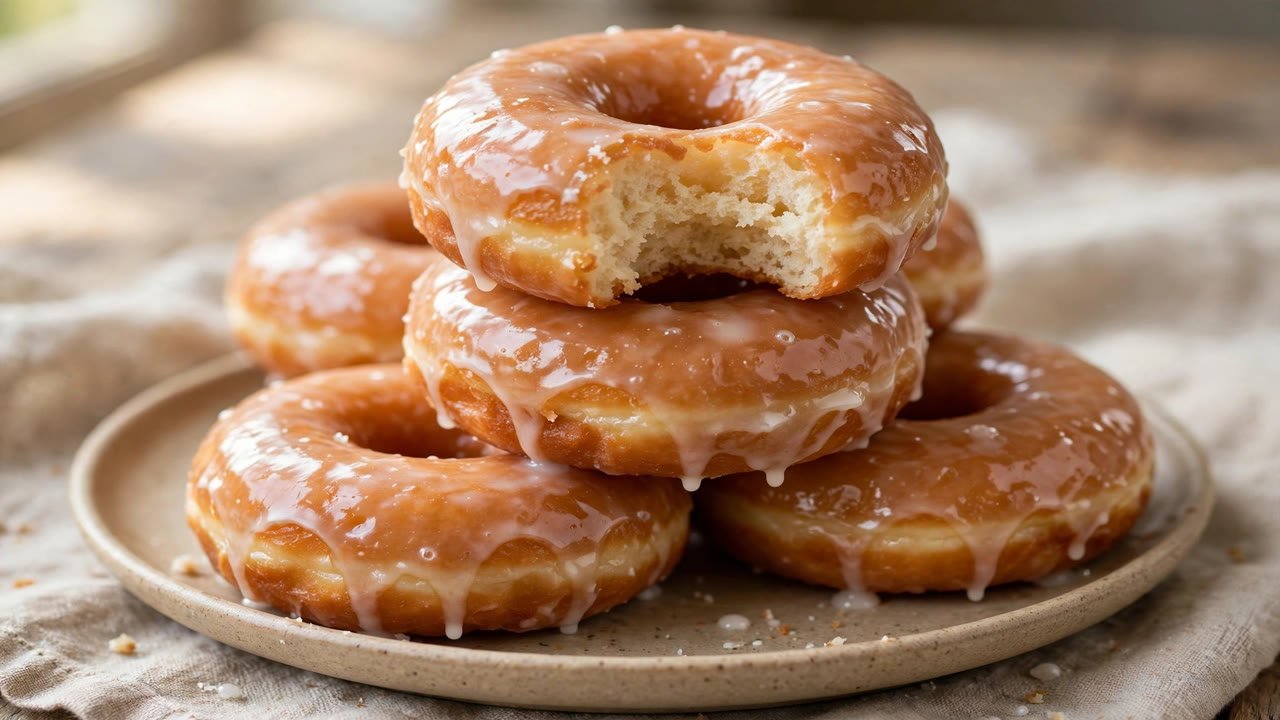
Who says you need a deep fryer or hours of prep to enjoy fresh, pillowy donuts at home? With this easy homemade donuts recipe, you’ll whip up golden, tender treats in under 30 minutes with no special equipment required. Whether you’re craving classic glazed rings, cinnamon-sugar twists, or chocolate-dipped delights, this foolproof method delivers bakery-quality results using pantry staples and simple techniques. Perfect for weekend brunches, rainy-day baking, or satisfying that sudden sweet tooth, these donuts are crispy on the outside, cloud-soft inside, and absolutely irresistible.
Easy Homemade Donuts
Ingredients
Equipment
Method
- Make the dough: In a large bowl, whisk the self-rising flour and sugar. Add the buttermilk, egg, melted butter, and vanilla. Stir gently until just combined. Do not overmix.
- Roll and cut: Pat the dough into a 1/2 inch thick rectangle on a floured surface. Cut out donut shapes with a 3 inch cutter or a drinking glass, and punch out the centers for rings.
- Heat the oil: Pour oil into a heavy-bottomed skillet or Dutch oven to 1 1/2 inches deep. Heat over medium heat to 350°F (175°C).
- Fry: Fry 2 to 3 donuts at a time for 1 to 1 1/2 minutes per side until deeply golden. Transfer to a wire rack to drain.
- Finish warm: While still warm, dip in glaze, roll in cinnamon sugar, or dust with powdered sugar. Serve immediately.
Notes
Why This Easy Homemade Donuts Recipe Works
This recipe is built for real life: no yeast, no waiting, no stress. Instead of traditional yeast-raised donuts that require proofing and double frying, we use a quick-rise biscuit-style dough made with self-rising flour and buttermilk. The result? Donuts that puff up beautifully in hot oil, absorbing just enough fat to stay moist without being greasy. Plus, they’re ready from bowl to plate in half an hour, making them ideal for impromptu cravings or last-minute dessert fixes.
What sets this version apart is its accessibility. You don’t need a stand mixer, donut cutter, or even a thermometer. A bowl, spoon, and common kitchen tools are all it takes. And because the dough is forgiving, beginners can confidently roll, cut, and fry without fear of failure. Whether you’re a seasoned baker or trying your hand at frying for the first time, this method delivers consistent, delicious results every time.
Ingredients You Already Have (No Specialty Items!)
One of the best things about this easy homemade donuts recipe is how few ingredients it calls for, most of which are likely already in your kitchen. Here’s what you’ll need:
- 2 cups self-rising flour: the magic ingredient! It eliminates the need for separate baking powder and salt.
- 1/2 cup granulated sugar: adds subtle sweetness to the dough itself.
- 1/2 cup buttermilk: provides tanginess and tenderness; if you don’t have it, mix 1/2 cup milk + 1/2 tsp vinegar and let sit 5 minutes.
- 1 large egg: binds the dough and adds richness.
- 2 tbsp unsalted butter, melted: for moisture and flavor.
- 1 tsp vanilla extract: enhances aroma and taste.
- Vegetable or canola oil: for frying (about 2 to 3 cups, depending on your pan).
Optional add-ins like cinnamon, nutmeg, or lemon zest can be folded into the dough for extra depth. But even plain, these donuts shine, especially when finished with your favorite glaze or coating.
Step-by-Step Instructions: Fry Like a Pro at Home
1. Make the Dough
In a large mixing bowl, whisk together the self-rising flour and sugar. Create a well in the center and pour in the buttermilk, egg, melted butter, and vanilla. Stir gently with a wooden spoon or spatula until just combined (don’t overmix). The dough will be soft and slightly sticky, which is perfect for tender donuts.
2. Roll and Cut
Lightly flour your work surface and hands. Turn the dough out and gently pat it into a 1/2 inch thick rectangle. Use a round cookie cutter (about 3 inches wide) or a drinking glass to cut out donut shapes. Re-roll scraps once, but avoid overworking, as this can make the donuts tough. Use a smaller cutter or bottle cap to punch out centers if you want classic rings.
3. Heat the Oil
Pour oil into a heavy-bottomed skillet or Dutch oven until it’s about 1 1/2 inches deep. Heat over medium heat until it reaches 350°F (175°C). No thermometer? Test by dropping in a small piece of dough. If it sizzles and rises to the surface within 10 seconds, you’re ready. Too cool, and the donuts will absorb too much oil; too hot, and they’ll burn before cooking through.
4. Fry to Golden Perfection
Carefully place 2 to 3 donuts into the hot oil, leaving space between them. Fry for 1 to 1 1/2 minutes per side, flipping once, until deeply golden brown. Use tongs or a slotted spoon to transfer them to a wire rack set over a baking sheet (or paper towels) to drain excess oil. For a deeper look at frying technique, see this yeast-raised doughnut guide from Serious Eats.
5. Finish While Warm
Donuts are best enjoyed warm! While they’re still slightly warm, dip them in glaze, roll them in cinnamon sugar, or dust with powdered sugar. The heat helps coatings adhere beautifully. Serve immediately for the ultimate melt-in-your-mouth experience.
Glaze & Coating Ideas to Elevate Your Donuts
The beauty of this easy homemade donuts recipe is its versatility. Once your donuts are fried and cooled slightly, the topping possibilities are endless. Here are three crowd-pleasing options:
Classic Vanilla Glaze
Whisk together 1 cup powdered sugar, 2 to 3 tbsp milk, and 1/2 tsp vanilla until smooth. Dip warm donuts into the glaze, then let excess drip off before placing on a rack. For extra flair, add rainbow sprinkles while the glaze is still wet.
Cinnamon Sugar Crunch
Mix 1/4 cup granulated sugar with 1 tsp ground cinnamon. While donuts are still warm, brush lightly with melted butter, then roll generously in the sugar mixture. The contrast of warm, spiced crunch against the soft interior is pure comfort.
Chocolate Drizzle
Melt 1/2 cup semi-sweet chocolate chips with 1 tbsp coconut oil or butter in the microwave (30-second intervals, stirring in between). Drizzle over cooled donuts using a fork or piping bag. Add sea salt flakes for a gourmet touch.
Pro Tips for Perfect Homemade Donuts Every Time
Even simple recipes benefit from a few insider tricks. Keep these in mind for consistently amazing results:
- Don’t overwork the dough. Mix just until ingredients come together (lumps are okay). Overmixing develops gluten, leading to chewy, not fluffy, donuts.
- Maintain steady oil temperature. If the oil cools too much, donuts will soak up grease. If it gets too hot, the outside burns before the inside cooks. Adjust heat as needed.
- Fry in small batches. Crowding the pan lowers the oil temperature and causes uneven cooking. Give each donut room to breathe.
- Use a wire rack, not paper towels alone. This prevents steam from making the bottoms soggy and keeps the glaze or coating crisp.
- Serve immediately. Donuts are best eaten fresh, within an hour of frying. Reheating in an oven (350°F for 3 to 5 minutes) can revive day-old ones, but they won’t match the first-day magic.
Nutritional Notes & Serving Suggestions
While these donuts are a treat, they’re meant to be enjoyed in moderation as part of a balanced diet. A single unfrosted donut (about 2 oz) contains roughly 180 to 220 calories, 8 to 10g fat, and 25 to 30g carbohydrates, depending on size and coating. Pair them with a protein-rich breakfast, like Greek yogurt or scrambled eggs, to balance the meal.
For a fun twist, serve mini donuts as party favors or pack them in lunchboxes for a surprise dessert. They also make excellent gifts when tucked into cute treat bags with a handwritten note. For more classic homemade desserts, try our New York cheesecake or French crème brûlée. Just remember: homemade donuts are best shared (or secretly savored with your morning coffee).
Key Takeaways
- This easy homemade donuts recipe uses simple ingredients and takes less than 30 minutes from start to finish.
- No yeast or special tools required, just a bowl, spoon, and skillet.
- The biscuit-style dough yields tender, fluffy donuts with a crisp exterior.
- Customize with glazes, sugars, or spices to match your mood or occasion.
- Fry in small batches at 350°F for even browning and minimal oil absorption.
- Enjoy warm for the best texture and flavor, perfect for weekend treats or special mornings.
Frequently Asked Questions
Can I bake these donuts instead of frying?
Yes! For a lighter option, bake the shaped donuts on a parchment-lined baking sheet at 375°F (190°C) for 10 to 12 minutes, flipping halfway through. They won’t be as crispy, but still delicious. Lightly brush with oil or butter before baking for better browning.
What if I don’t have self-rising flour?
Make your own! Mix 2 cups all-purpose flour with 3 tsp baking powder and 1 tsp salt. Whisk well before using. This substitution works perfectly in this recipe.
How do I store leftover donuts?
Store cooled, unfrosted donuts in an airtight container at room temperature for up to 2 days. Glazed donuts are best eaten the same day, as the coating can soften. For longer storage, freeze uncoated donuts for up to 1 month, then thaw and reheat in the oven before adding toppings.
Can I make the dough ahead of time?
The dough is best used fresh, since the leavening in self-rising flour starts working as soon as it gets wet. You can still save time by measuring all the dry ingredients and whisking the glaze ahead. Then mixing, shaping, and frying take only about 20 minutes the next morning.
There’s something deeply satisfying about pulling golden, fragrant donuts from your own kitchen, especially when the process is this simple. This easy homemade donuts recipe removes the intimidation factor of frying and delivers joy in every bite. Whether you’re treating yourself, impressing guests, or introducing kids to the magic of baking, these donuts prove that the best desserts don’t need complexity, just love, care, and a little hot oil. So grab your apron, heat that pan, and get ready to enjoy the fluffiest, most delicious donuts you’ve ever made at home.
About the Author
Luke is the home cook and writer behind Lumomint Foods. He spends his time testing comforting, practical recipes from around the world and writing them up in plain, easy language for everyday cooks.
4 thoughts on “Easy Homemade Donuts Recipe”