
Easy Homemade Ice Cream Without a Machine
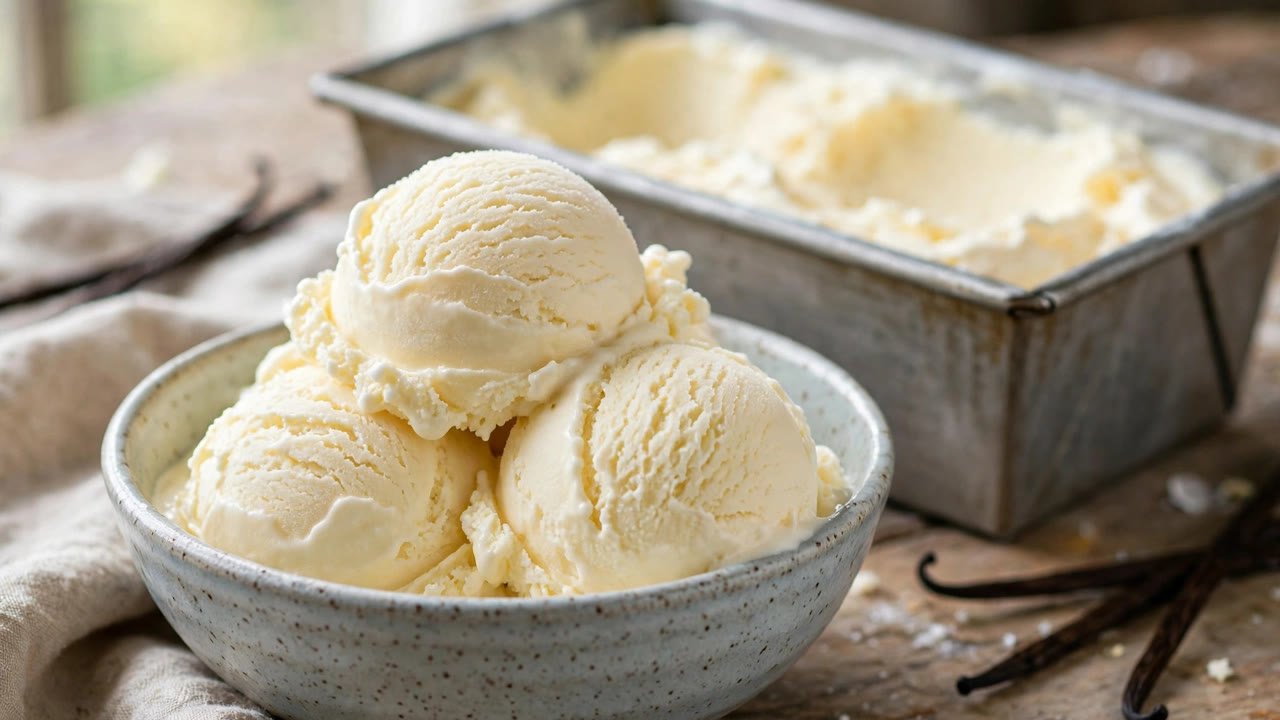
Want rich, velvety ice cream without the hassle of an ice cream maker? You’re in the right place. This easy homemade ice cream without machine recipe delivers restaurant-quality results using simple ingredients and minimal effort. No fancy equipment, no complicated steps—just creamy, dreamy dessert made entirely by hand.
Whether you’re a busy parent, a college student, or someone who simply doesn’t own an ice cream machine, this no-churn method is your new go-to. With just a few pantry staples and about 10 minutes of prep time, you can enjoy smooth, scoopable ice cream that rivals store-bought versions—without the preservatives or artificial flavors.
Why Make Ice Cream Without a Machine?
Traditional ice cream makers require freezing bowls, electricity, and often a significant upfront investment. But the truth is, you don’t need one to make excellent ice cream at home. The no-churn technique uses whipped cream and sweetened condensed milk as a base, creating a light yet dense texture that freezes beautifully.
This method is perfect for beginners. There’s no risk of over-churning, no fear of ice crystals forming (when done right), and no waiting hours for a machine to do its work. Plus, it’s incredibly versatile—swap in your favorite mix-ins, swirls, or flavor extracts to customize every batch.
Best of all? It’s budget-friendly. Most ingredients are already in your kitchen, and you’ll save money compared to buying premium pints from the grocery store.
What You’ll Need: Simple Ingredients for No-Churn Ice Cream
The beauty of this recipe lies in its simplicity. You only need four core ingredients—plus any extras you want to add for flavor. Here’s what goes into every batch of creamy, dreamy homemade ice cream:
- Heavy whipping cream – Provides richness and structure when whipped.
- Sweetened condensed milk – Adds sweetness and creaminess without graininess.
- Vanilla extract – The classic flavor base (or use your favorite extract).
- Pinch of salt – Enhances flavor and balances sweetness.
Optional add-ins include cocoa powder for chocolate ice cream, fruit puree for sorbet-style blends, crushed cookies, chocolate chips, or even a swirl of caramel or peanut butter. The possibilities are endless—and entirely up to you.
Equipment Checklist (No Machine Needed!)
Don’t worry—you won’t need any specialty tools. Just gather these basics:
- A large mixing bowl
- Hand mixer or stand mixer (or a whisk if you’re feeling energetic!)
- Spatula
- Loaf pan or airtight container for freezing
That’s it! No ice cream machine, no salt-and-ice setup—just your standard kitchen gear.
Step-by-Step Guide: How to Make Easy Homemade Ice Cream Without Machine
Follow these simple steps for foolproof, creamy ice cream every time. The entire process takes under 15 minutes of active prep, then it’s just a matter of freezing.
Step 1: Whip the Cream
Pour 2 cups (about 480ml) of cold heavy whipping cream into a large bowl. Using a hand mixer or stand mixer, beat on medium-high speed until stiff peaks form. This usually takes 3–5 minutes. You’ll know it’s ready when the cream holds its shape and doesn’t slide off the beaters.
Pro tip: Make sure your cream and bowl are cold—this helps it whip faster and hold its volume better.
Step 2: Combine with Sweetened Condensed Milk
In a separate bowl, whisk together 1 can (14 oz or 397g) of sweetened condensed milk, 1–2 teaspoons of vanilla extract, and a tiny pinch of salt. This mixture is thick, sweet, and creamy—the secret to smooth texture without churning.
Gently fold the sweetened condensed milk mixture into the whipped cream using a spatula. Use slow, sweeping motions from the bottom up to keep the air in the whipped cream. Overmixing will deflate it, so stop as soon as everything is combined and no streaks remain.
Step 3: Add Your Favorite Mix-Ins
This is where you get creative! Stir in chocolate chips, crushed Oreos, fresh berries, swirls of jam, or a spoonful of instant coffee for mocha flavor. For fruit flavors, fold in ½ to ¾ cup of pureed strawberries, mangoes, or peaches.
If you’re making swirled ice cream (like salted caramel or peanut butter), drizzle the swirl ingredient over the top and use a knife to gently marble it through—don’t overmix!
Step 4: Freeze Until Firm
Pour the mixture into a loaf pan or airtight container. Smooth the top with a spatula. Cover tightly with plastic wrap or a lid to prevent ice crystals and freezer odors.
Freeze for at least 6 hours, but ideally overnight. The longer it freezes, the firmer and more scoopable it becomes.
Tips for Perfect No-Churn Ice Cream Every Time
Even the simplest recipes benefit from a few insider tricks. These tips will help you avoid common pitfalls and ensure your ice cream is silky, smooth, and full of flavor.
- Use cold ingredients: Cold cream whips better and holds more air. Chill your bowl and beaters for 10 minutes before starting if possible.
- Don’t skip the salt: A tiny pinch enhances sweetness and rounds out the flavor.
- Fold, don’t stir: Preserve the airiness of the whipped cream by folding gently.
- Cover tightly: Prevent ice crystals by pressing plastic wrap directly onto the surface before freezing.
- Let it soften slightly before serving: Take the ice cream out 5–10 minutes before scooping for easier serving.
And remember: this recipe is forgiving. If your first batch isn’t perfect, tweak the next one—add more vanilla, less sugar, or a different mix-in. Homemade ice cream is all about personal preference.
Flavor Variations to Try at Home
Once you master the basic recipe, the fun begins. Here are five delicious variations to inspire your next batch:
Classic Vanilla Bean
Use real vanilla bean paste or scrape the seeds from a vanilla pod into the condensed milk mixture. The flecks of vanilla add elegance and depth.
Chocolate No-Churn Ice Cream
Melt ¼ cup of dark chocolate chips and mix into the condensed milk before folding into whipped cream. For extra richness, add a tablespoon of cocoa powder.
Strawberry Swirl
Puree 1 cup of fresh strawberries with 1 tablespoon of sugar. Swirl the puree into the base before freezing for a fruity, vibrant treat.
Mint Chocolate Chip
Add ½ teaspoon of peppermint extract to the condensed milk and fold in mini chocolate chips. For a natural green tint, use a drop of food coloring or spinach puree (yes, really—it’s undetectable!).
Coffee Lovers’ Dream
Stir 1–2 tablespoons of instant espresso powder into the condensed milk until dissolved. The result is a bold, aromatic coffee ice cream that’s perfect after dinner.
Nutritional Notes & Serving Suggestions
While this ice cream is indulgent, it’s made with real ingredients—no stabilizers, emulsifiers, or high-fructose corn syrup. A typical ½-cup serving contains around 250–300 calories, depending on mix-ins.
Serve it in waffle cones, atop warm brownies, or alongside fresh fruit for a balanced dessert. It also pairs beautifully with hot fudge sauce or a sprinkle of sea salt for a sweet-salty contrast. For more homemade dessert ideas, try our Turkish baklava or our Belgian waffles.
Store leftovers in an airtight container in the freezer for up to 2 weeks. For best texture, let it soften slightly at room temperature before scooping.
Key Takeaways
- You can make easy homemade ice cream without machine using just whipped cream and sweetened condensed milk.
- No special equipment is needed—just a mixer, bowl, and freezer.
- The no-churn method yields creamy, scoopable ice cream in under 15 minutes of prep.
- Customize with your favorite flavors, fruits, or mix-ins for endless variety.
- Keep ingredients cold and fold gently to maintain a light, airy texture.
FAQ: Your Questions About No-Churn Ice Cream, Answered
Can I make this ice cream without a mixer?
Yes! If you don’t have a mixer, use a whisk and some elbow grease. Whip the cream in a cold bowl until stiff peaks form—it will take longer (about 8–10 minutes), but it’s totally doable.
Why is my ice cream icy instead of creamy?
Icy texture usually happens when the cream isn’t whipped enough or the mixture isn’t covered properly during freezing. Make sure you achieve stiff peaks and press plastic wrap directly onto the surface before freezing.
Can I use low-fat or dairy-free alternatives?
Traditional no-churn ice cream relies on heavy cream and sweetened condensed milk for texture. However, you can experiment with coconut cream and coconut condensed milk for a dairy-free version—results may vary slightly in texture, but it’s still delicious!
Final Thoughts: Enjoy Homemade Ice Cream, No Machine Required
Making easy homemade ice cream without machine isn’t just possible—it’s fun, fast, and deeply satisfying. You’ll impress family and friends with desserts that taste like they came from a gourmet shop, all while using ingredients you already have on hand.
This recipe removes the barrier of expensive equipment and complex techniques, opening the door for everyone to enjoy fresh, customizable ice cream whenever the craving strikes. Whether it’s a hot summer afternoon or a cozy winter night, your freezer can now hold a pint of pure joy—made by you.
So grab your whisk, chill your bowl, and get ready to scoop into something truly special. Your perfect bowl of homemade ice cream is just minutes away.
Easy No-Churn Homemade Ice Cream
Ingredients
Equipment
Method
- Chill a large mixing bowl and beaters for 10 minutes. Pour the cold heavy cream into the bowl and whip to stiff peaks.
- In a separate bowl, whisk the sweetened condensed milk with vanilla extract and salt.
- Gently fold the condensed milk mixture into the whipped cream until just combined.
- Pour into a loaf pan, smooth the top, cover with plastic wrap pressed on the surface, and freeze at least 6 hours or overnight.
- Let soften 5 to 10 minutes before scooping and serve.
About the Author
Luke is the home cook and writer behind Lumomint Foods. He spends his time testing comforting, practical recipes from around the world and writing them up in plain, easy language for everyday cooks.
4 thoughts on “Easy Homemade Ice Cream Without a Machine”