
Easy Homemade Sushi Rolls for Beginners
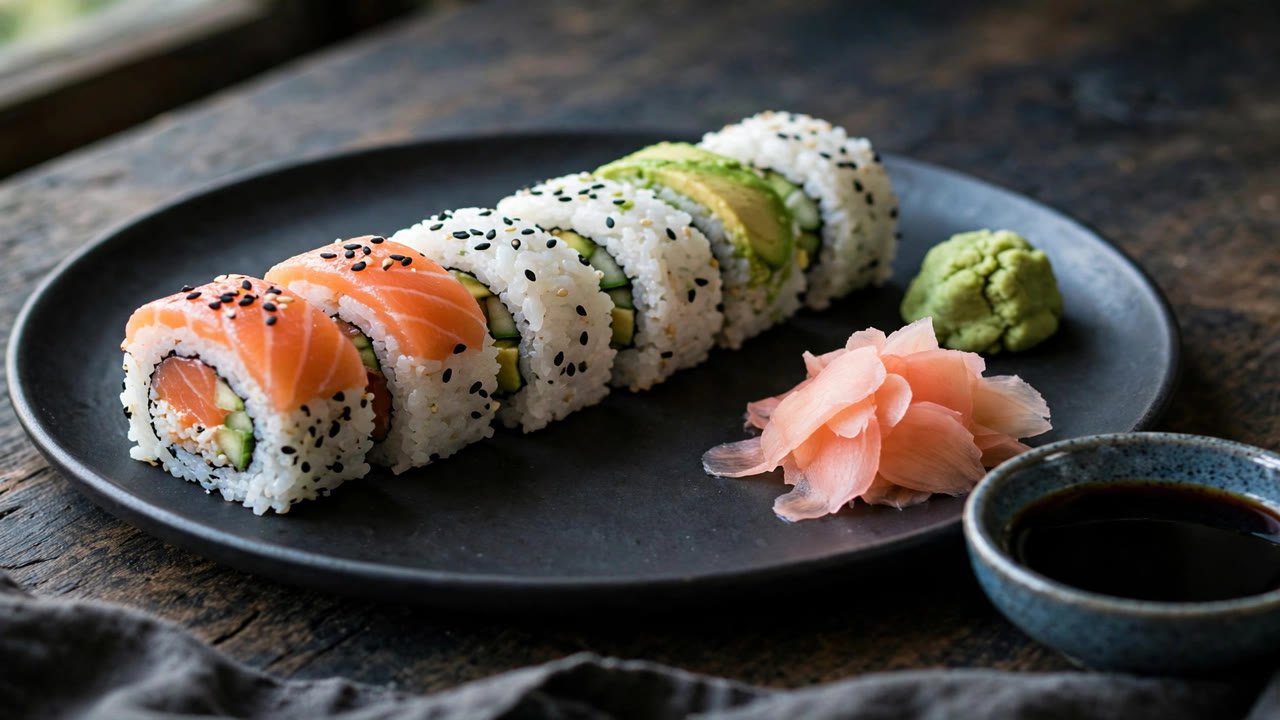
Want to make delicious sushi at home but think it’s too complicated? You’re not alone. Many beginners assume sushi rolling requires years of training, but the truth is you can create fresh, restaurant-quality sushi rolls in your own kitchen with just a few simple ingredients. This beginner-friendly guide walks you through every step, from choosing the right rice to mastering the roll, so you can enjoy homemade sushi without the guesswork.
Easy Homemade Sushi Rolls for Beginners
Ingredients
Equipment
Method
- Rinse the sushi rice under cold water until the water runs mostly clear. Cook with 1 1/4 cups water according to package directions, then let it steam for 10 minutes off the heat.
- While the rice is still warm, gently fold in the rice vinegar, sugar, and salt. Fan the rice as you mix for a glossy finish, then let it cool to room temperature.
- Prep your fillings: slice the avocado thin, julienne the cucumber, and set out the crab sticks. Keep a small bowl of water nearby for your hands.
- Lay a bamboo mat on the counter and place a nori sheet shiny side down. With wet hands, spread about 3/4 cup of rice evenly over the nori, leaving a 1 inch border at the top.
- Arrange the avocado, cucumber, and crab sticks in a horizontal line across the center of the rice. Do not overfill, or the roll will be hard to close.
- Lift the edge of the mat closest to you, tuck the fillings in gently, and roll forward with light, steady pressure. Moisten the bare border with water to seal the roll.
- Let the roll rest for 5 minutes, then slice into 6 to 8 pieces with a sharp, wet knife, wiping the blade between cuts. Serve with soy sauce, wasabi, and pickled ginger.
Notes
Why Make Sushi at Home?
Making sushi at home is more affordable, healthier, and far more customizable than ordering takeout. You control the ingredients, avoid unnecessary additives, and can tailor flavors to your taste. Plus, it’s a fun, hands-on activity that brings family and friends together. Whether you’re preparing a light lunch or an impressive dinner appetizer, homemade sushi rolls are surprisingly easy once you know the basics.
Contrary to popular belief, you don’t need a sushi chef’s knife or a bamboo mat (though a mat helps). With everyday kitchen tools and a little patience, even first-timers can roll perfect maki. The key is starting simple. Focus on one type of roll, like a classic California roll or cucumber avocado roll, and build confidence from there.
Essential Ingredients for Beginner Sushi Rolls
Before you begin, gather these core ingredients. Most are available at your local grocery store or Asian market:
- Sushi rice (short-grain Japanese rice), sticky and slightly sweet when cooked
- Rice vinegar, which adds the signature tangy flavor
- Nori sheets, dried seaweed wrappers that are crisp and slightly salty
- Fresh vegetables like cucumber, avocado, and carrots work best for beginners
- Protein options like cooked crab sticks, smoked salmon, or tofu for a vegetarian twist
- Soy sauce, wasabi, and pickled ginger for serving and enhancing flavor
Avoid using long-grain rice. It won’t stick together properly. Sushi rice is essential because it holds its shape when rolled and has the right texture. Rinse it thoroughly before cooking to remove excess starch, which prevents gummy results.
Simple Sushi Rice Recipe
Perfect sushi rice is the foundation of great rolls. Here’s how to make it:
| Ingredient | Amount |
|---|---|
| Sushi rice | 1 cup (uncooked) |
| Water | 1¼ cups |
| Rice vinegar | 2 tablespoons |
| Sugar | 1 tablespoon |
| Salt | ½ teaspoon |
Cook the rice according to package instructions, then let it steam for 10 minutes off the heat. While still warm, gently fold in the vinegar mixture (vinegar, sugar, and salt dissolved together). Fan the rice as you mix to cool it quickly and give it a glossy finish. Never stir vigorously, as this breaks the grains and makes the rice mushy. For a deeper dive into seasoning, see this sushi rice guide from Serious Eats.
Tools You’ll Need (No Specialty Gear Required)
You don’t need a sushi bar’s worth of tools. These everyday items are all you need:
- Bamboo sushi mat (makisu), which helps shape and tighten rolls
- Sharp knife with a clean, non-serrated blade for clean cuts
- Small bowl of water to wet your hands and prevent sticking
- Plastic wrap, optional but helpful for keeping the mat clean
- Rice cooker or pot for cooking rice evenly
If you don’t have a bamboo mat, you can use a clean kitchen towel or even a silicone baking mat. The goal is to have something flexible to help compress and shape the roll as you go.
Step-by-Step Guide to Rolling Your First Sushi Roll
Now for the fun part: rolling! Follow these steps for a foolproof beginner roll. We’ll use a classic inside-out roll (uramaki), which is easier for newcomers because the rice is on the outside.
Step 1: Prepare Your Workspace
Lay out your bamboo mat and cover it with plastic wrap if desired. Place a nori sheet shiny-side down on the mat. Have your bowl of water, rice, fillings, and a plate ready. Keep your hands slightly wet to prevent rice from sticking.
Step 2: Spread the Rice
Take about ¾ cup of cooled sushi rice and gently spread it over the nori, leaving a 1-inch border at the top edge. Press lightly—don’t pack it too thick, or the roll will be hard to close. The rice layer should be even but not dense.
Step 3: Add Fillings
Place your fillings horizontally across the center of the rice. For a beginner roll, try:
- 1/2 avocado, sliced thin
- 1/2 cucumber, julienned (seeds removed)
- 2 to 3 crab sticks (imitation or real)
Don’t overstuff. One or two ingredients are plenty for your first attempt. Too much filling makes rolling difficult and causes the nori to tear.
Step 4: Roll It Up
Lift the edge of the bamboo mat closest to you and fold it over the fillings. Tuck the fillings in gently, then continue rolling forward, applying light pressure to keep the roll tight. When you reach the rice-free border, moisten it with water to seal the roll.
Step 5: Slice and Serve
Use a sharp, wet knife to cut the roll into 6 to 8 even pieces. Wipe the blade between cuts for clean edges. Serve immediately with soy sauce, wasabi, and pickled ginger.
Beginner-Friendly Sushi Roll Ideas
Once you’ve mastered the basic roll, try these simple variations:
1. Cucumber Avocado Roll
A fresh, vegetarian option that’s crisp and creamy. Just swap the crab for extra cucumber and avocado. Light, healthy, and perfect for warm days.
2. Spicy Tuna Roll (Simplified)
Mix canned tuna with a little mayo and a dash of sriracha. Spread over rice, add cucumber, and roll as usual. No raw fish needed—great for cautious beginners.
3. Sweet Potato Tempura Roll
Use store-bought or homemade sweet potato tempura strips. The slight sweetness pairs beautifully with the salty nori and tangy rice.
4. Philly Roll (Smoked Salmon & Cream Cheese)
Layer smoked salmon and a thin strip of cream cheese over rice. Add cucumber for crunch. Rich, satisfying, and familiar to many Western palates.
Common Mistakes Beginners Make (And How to Avoid Them)
Even with the best intentions, new sushi makers often run into a few hiccups. Here’s how to sidestep them:
- Overfilling the roll leads to messy, hard-to-close rolls. Stick to 2 to 3 fillings max.
- Using cold or under-seasoned rice. Warm, vinegared rice is key. Cold rice won’t stick.
- Rolling too loosely. Apply steady pressure with the mat to keep the roll compact.
- Cutting with a dry knife. Always wet your knife before slicing to prevent tearing.
- Using stale or low-quality nori. Fresh nori is crisp and pliable. Store in an airtight container.
Remember: practice makes progress. Your first roll might not look perfect, and that’s okay.
Tips for Success: Pro Secrets from Home Cooks
Want to elevate your sushi game? Try these insider tips:
- Chill your fillings. Cold ingredients stay crisp and don’t make the rice soggy.
- Use a rice paddle or spatula to spread rice evenly without crushing grains.
- Let the roll rest for 5 minutes before cutting so the nori rehydrates slightly and holds its shape.
- Experiment with sauces. Try eel sauce, spicy mayo, or ponzu for extra flavor.
- Make it a party. Set up a sushi bar with fillings and let everyone build their own rolls.
And don’t forget presentation! Arrange slices on a wooden board with garnishes like sesame seeds, microgreens, or edible flowers. A little effort goes a long way in making your homemade sushi feel special.
Nutritional Benefits of Homemade Sushi
When made with wholesome ingredients, sushi can be a nutritious meal. Sushi rice provides complex carbohydrates for energy, while vegetables add fiber, vitamins, and antioxidants. Nori is rich in iodine, iron, and vitamin B12. Adding fish like salmon boosts omega-3 fatty acids, supporting heart and brain health.
By avoiding deep-fried tempura or heavy sauces, you keep calories and sodium in check. Homemade sushi lets you enjoy a balanced, flavorful dish without hidden additives or excessive sugar.
Storing and Reheating Sushi Safely
Sushi is best eaten fresh, within a few hours of making it. If you must store it, wrap rolls tightly in plastic wrap and refrigerate for up to 24 hours.
Never reheat sushi in the microwave. It ruins the rice and nori. Instead, enjoy leftovers cold or at room temperature.
Key Takeaways
- Easy homemade sushi rolls are achievable for beginners with minimal tools and ingredients.
- Start with simple fillings like cucumber, avocado, and crab sticks.
- Perfect sushi rice is sticky, slightly sweet, and vinegared. Rinse well and season while warm.
- Use a bamboo mat and wet hands to roll tightly and prevent sticking.
- Avoid overfilling and always use a sharp, wet knife for clean cuts.
- Practice makes progress. Your first roll doesn’t have to be perfect to taste great.
Frequently Asked Questions
Can I make sushi without raw fish?
Absolutely! Many beginner-friendly rolls use cooked ingredients like crab sticks, smoked salmon, tofu, or vegetables. You can make delicious, safe sushi without any raw fish at all.
Do I really need a bamboo mat?
While not strictly necessary, a bamboo mat makes rolling much easier and helps create tight, even rolls. If you don’t have one, a clean kitchen towel or silicone mat can work in a pinch.
How do I keep sushi rice from sticking to my hands?
Keep a small bowl of water nearby and dip your fingertips before handling the rice. This prevents sticking and helps you spread the rice smoothly over the nori.
Final Thoughts
Making sushi at home is easier than it looks, and this beginner method proves it. Once you have seasoned rice and a few fresh fillings, rolling becomes second nature. Do not worry if your first roll is lopsided. It will still taste fresh and delicious.
If you enjoy hands-on cooking projects, my classic eggs benedict for beginners is another fun weekend recipe.
For a quick seafood dinner, try my easy shrimp tacos with fresh sauce.
About the Author
Luke is the home cook and writer behind Lumomint Foods. He spends his time testing comforting, practical recipes from around the world and writing them up in plain, easy language for everyday cooks.
1 thought on “Easy Homemade Sushi Rolls for Beginners”